Change Default Folder Picture Windows 10 File Explorer
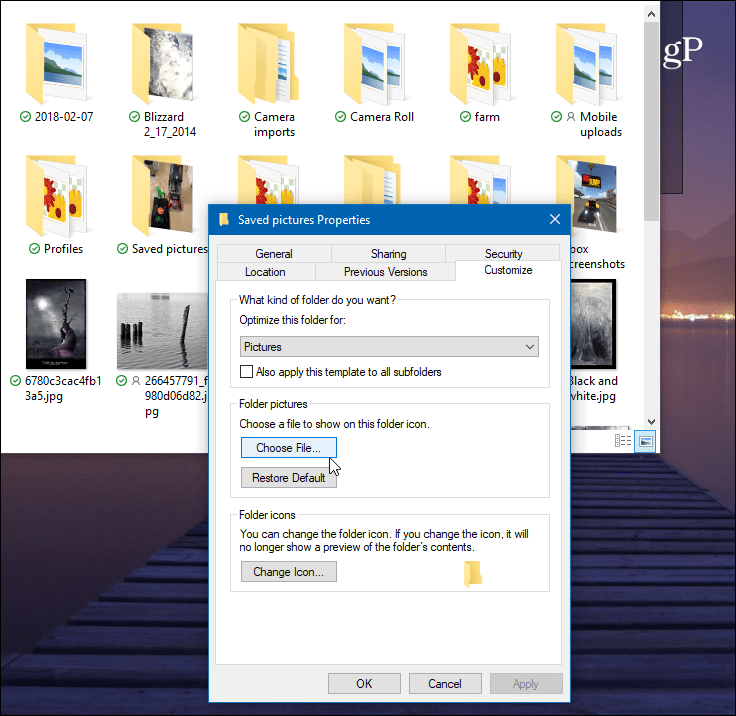
First, open File Explorer and right-click on the folder you want to change the default picture. And choose Properties from the context menu. Then click the Customize tab and click the “Choose File” button. For example, here I am changing the default photo for the folder named “Saved pictures.”
Then browse to the location of the image you want to use. It can come from the same folder or any other accessible location, including another drive or cloud storage like OneDrive or Dropbox. Click OK, and you should see the folder picture has changed. If you don’t see it right away, refresh the folder.
Another way you can do it is by using a trick that has been around at least since the XP days. This allows you to set a specific picture in a folder to display as the default. Where the method above lets you choose from any location. Now, since you are renaming the picture, you should copy it in that same folder first and then rename it. Open the folder with the picture you want to set as default. Then rename the picture you want as “folder.gif” and click “Yes” to the confirmation dialog that comes up. Now when you go back, the image you renamed will be displayed.
Keep in mind that if you use the first method described above, where you change the folder’s properties, the image you choose there will override anything you have set it by renaming it to “folder.gif,” so use one or the other accordingly. Comment Name * Email *
Δ Save my name and email and send me emails as new comments are made to this post.
![]()


