Setup and Use Microsoft Planner for Office 365
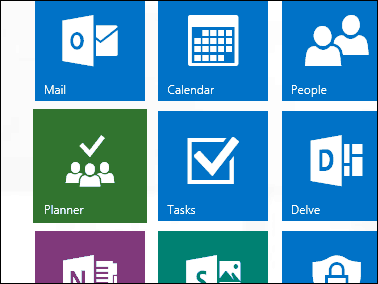
Microsoft Planner requires users have access to one of Microsoft 365 (formerly Office 365) business subscriptions such as E1, E3, or E5. If you already have an account, log into your account and then click the Planner icon. If you don’t have access to Planner, you might need to request your administrator enable it as part of its first release. Wait while Office Planner configures itself.
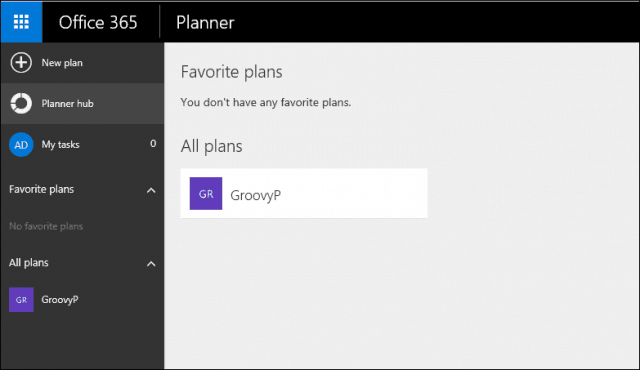
After logging in, you will see an empty interface. It features a clean, easy-to-navigate design. The taskbar on the left can be minimized, while groups can be collapsed. You can create a new plan, view existing plans in the hub, view assigned tasks and favorites. If you were already using Outlook Desktop Groups, they would show up in Planner. Groups can be used as a jumping board for an existing plan.
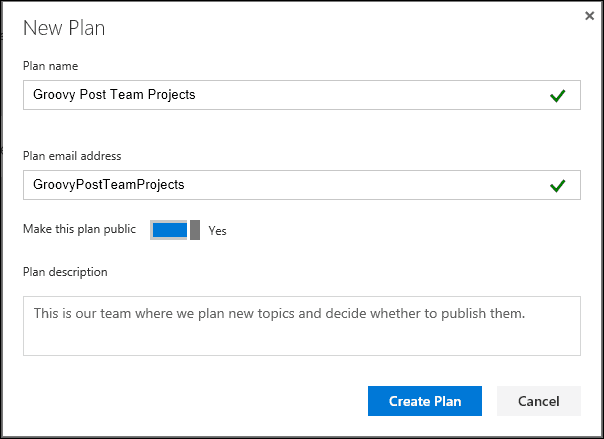
To create a new plan, click the New Plan tab, enter a name, choose whether you want to make it public or not, provide a description, then select Create Plan button.
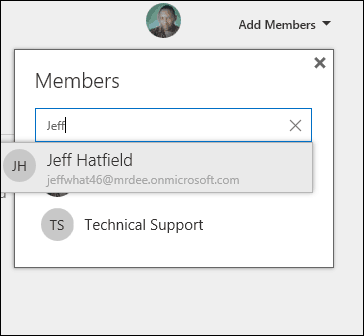
Because Planner works around teams, you want to add some members to assign projects. Click the Add Members menu in the top-right corner, then choose an existing member. If you don’t see any, you can search for them.
After your plan is created, you are taken to an interface that is quite familiar if you have used Trello before. Planner lets you create new tasks, schedule deadlines, and assign specific members.
Additional buckets can be created to manage the progress of each assigned task. Just like Trello, you can drag and drop tasks from one bucket to the next.
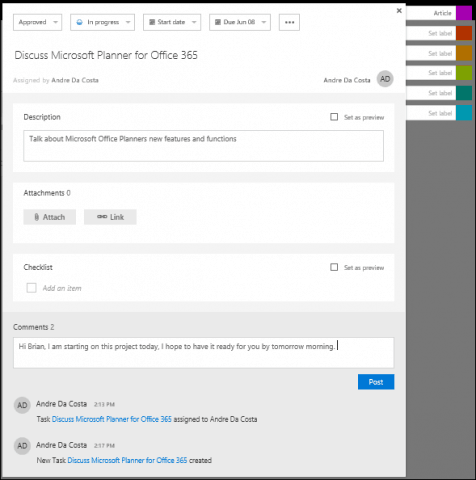
If you want, you can open up a job and contribute further details and assign a label. Files can be attached from OneDrive for Business or uploaded from your computer along with commentary and links.
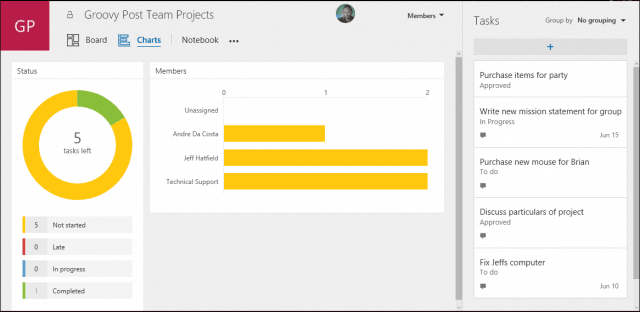
For group leaders managing complex projects, you can click the Charts tab, which gives a visual birds-eye view of each member’s progress. Users can see projects not started, late, in progress, or completed.
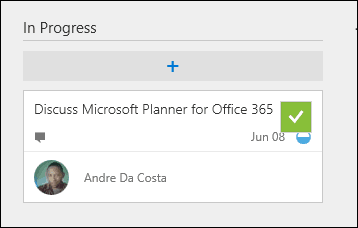
When a plan is complete, you can easily hover over the card then click the green check box to confirm its completion.
Microsoft’s Planner provides an easy-to-use experience for small or large teams, who only want to invest minimal resources to get a project up and running. The instantaneous effect of jumping in and starting a plan without a reference guide is quite powerful. Users invested in tools such as Trello won’t experience a significant learning curve. For mobile, Planner is not there yet, well, you can access it from a mobile web browser, but a dedicated mobile app is missing at this time. Personally, I don’t like using web apps like this on mobile devices. For a service like Trello, the majority of the time I am in the mobile app. Hopefully, Microsoft will follow up with this soon. Microsoft has started on the right path, it’s a pure web-based solution, no need to think about installing anything, no need to learn anything. The key advantage is Office integration, especially with apps such as Outlook and OneNote. For me business subscriptions are Business Basic and Standard, not E1, E3, or E5 as they are Enterprise subscriptions… So how about Business Basic? Comment Name * Email *
Δ Save my name and email and send me emails as new comments are made to this post.
![]()

