Extract Images from PDF
It actually couldn’t be easier. Open the PDF document from which you want images extracted. Then go to View » Tools » Document Processing on Adobe Acrobat Pro’s toolbar.
Now you’ll see a menu opening up on the right side of your Acrobat Pro window. In that menu, click Export All Images.
A window will pop up, allowing you to decide where you want the pictures saved.
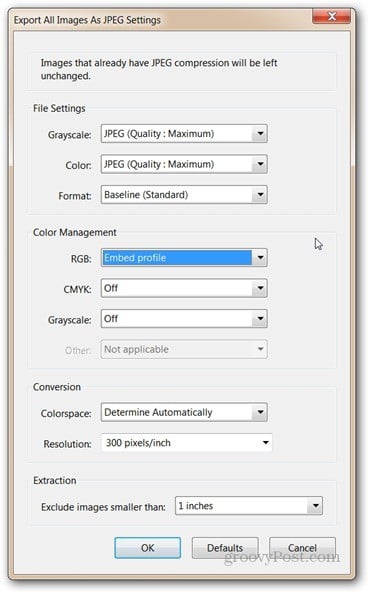
By clicking Settings in that window, you can set some specifics of the export operation – like the images or color management quality. You can also exclude smaller than a certain dimension in inches (1 inch, for example). This lets you avoid exporting graphic elements in the page, that you probably need.
When you’ve set the options, click OK. Then you’re returned to the previous window, click Save. The images will be exported to the folder you’ve selected. If you’re using Office 2010, try out the Nitro PDF Editing Companion. It lets provide Content Extraction (Convert to plain text, snapshot tool, Extract Images in PDFs). Comment Name * Email *
Δ Save my name and email and send me emails as new comments are made to this post.


![]()
